

How To Place Product In Image On White Background
How to Make a Background White in Photoshop
past Alexandra Bateman on Jun 17, 2022
Take yous ever taken what you call up is the perfect photo on a white background, only to observe that the white comes out grey in post-production? It happens to the best of us, but yous tin ready it by learning how to make a groundwork white in Photoshop!
While a plain white background might not seem important at first, information technology can exist crucial for your wedding photography collections, website images and commercial photos. After all, an epitome with pure white edges fades well into most websites. And, white backgrounds are like shooting fish in a barrel to make transparent for design projects!
Today, we're going to learn how to brand a groundwork white in Photoshop, so that y'all don't have to waste your otherwise perfect pics. Of course, you'll need Photoshop to follow along with this tutorial. If you lot don't have it nonetheless, yous can get Photoshop from Adobe's site equally part of their Artistic Cloud Package with Lightroom.
Without further ado, let'due south bound into it. How tin you brand a background white on Photoshop?
In today'southward blog, we'll look at:
- Why you need a plain white background
- Steps to brand a groundwork white in Photoshop with Levels Adjustments
- How to make a background white in Photoshop with Selection Tools
- How to test for pure white
Permit's go started.
Why Y'all Need a Evidently White Background
There are many reasons why photographers may need to supercede an object's groundwork with a apparently white space. For case, you might need to:
- Remove distractions: A pure white groundwork can give your subject field more focus and aid your clients expect their best.
- Fix colour issues: The wrong colors in a background can make your subjects look pale and reduce the impact of your photos.
- Prepare photos for commercial apply: Images with apparently white backgrounds tin be used for all sorts of branding initiatives both online, in print and in other advertisements.
With so many uses for photos with white backgrounds, it'south of import that you larn how to edit them properly! Let'due south take a wait at the steps to making a background white in Photoshop.
Steps to Brand a Background White in Photoshop
Equally with most editing operations in Photoshop, there are a number of ways to brand an image'due south groundwork white. We'll focus on two of these editing techniques in this tutorial and test them both out on the same image.
The first step in each approach is the same — getting your photo into Photoshop. Here's how to import your image to Photoshop:
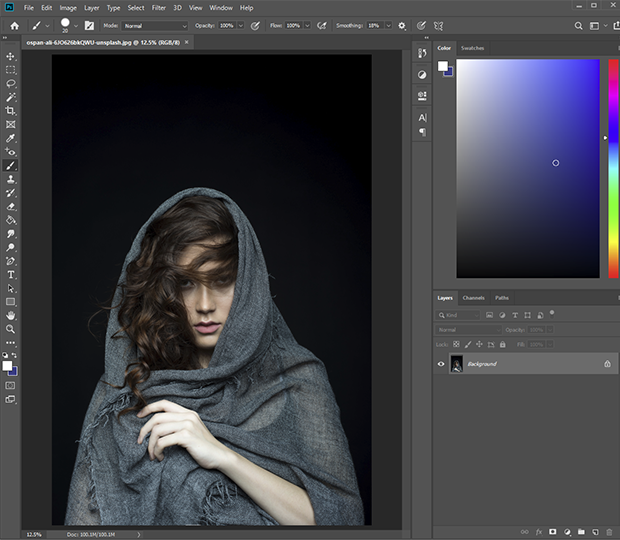
1. Open up Your Image in Photoshop
Y'all'll first need to open your image in Photoshop so that you tin work on making the groundwork white. Simply right-click on your photo, and so select Open with… and cull Photoshop. Your photo volition open in a new Photoshop window on your screen.
Before we tin can begin making edits, we demand to duplicate the original paradigm layer. Y'all could make your edits on the original image layer, but then yous run the risk of permanently changing the image file. Information technology'southward best exercise to edit on a indistinguishable layer so that the original layer remains intact.
To duplicate the image layer, choose Layer >> New >> Layer from the upper card bar to create a new layer.
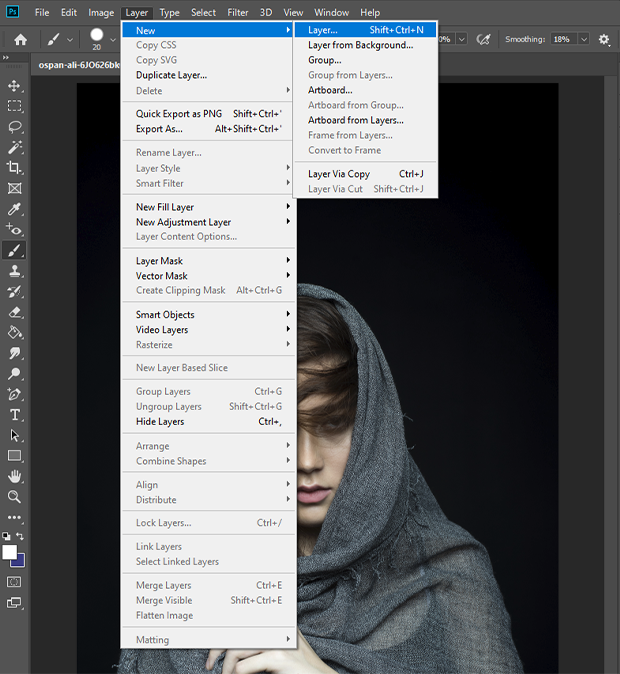
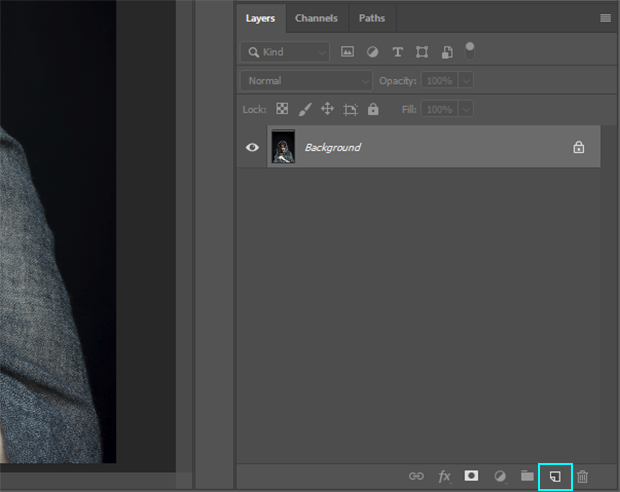
Or, click on the original layer in the Layers Panel on the bottom right of the screen, then elevate the layer to the New Layer button. This push button appears as a square mail service-it at the lesser of the Layers Console.
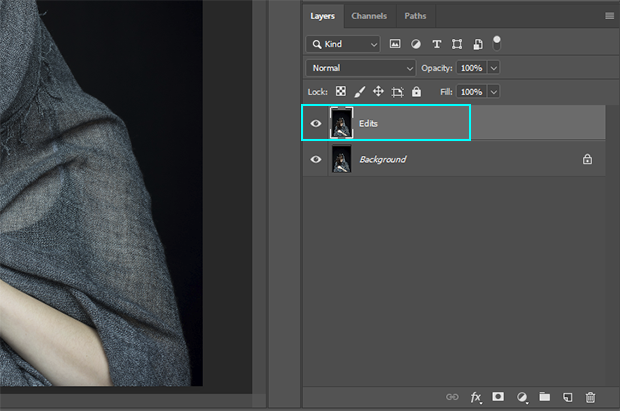
Once you've duplicated the layer, y'all can rename it however you choose. For the purposes of this tutorial, I'll name my indistinguishable layer "Edits," since it volition contain all of my edits to make the epitome background white.
Make a Groundwork White in Photoshop with Levels Adjustments
1 of the means to brand a background plain white in Photoshop is by adjusting the epitome'south color levels. This process is fairly simple for most images with uncomplicated backgrounds.
By adjusting the color levels, we can desaturate the image then that the background turns white.
1. Adjust Levels Sliders
In social club to adjust the levels, click Image in the superlative bill of fare, then select Adjustments >> Levels.
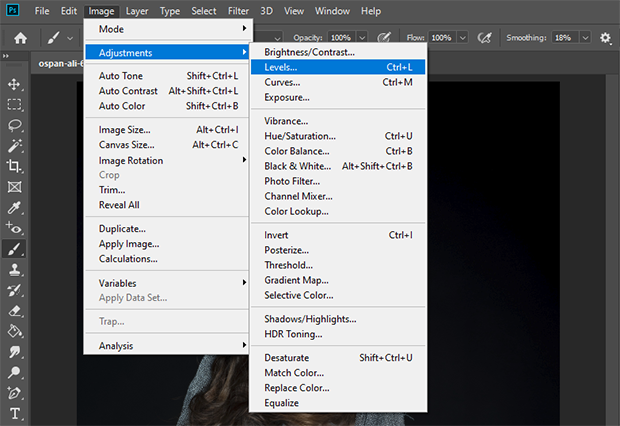
Photoshop will pull upwardly an adjustments slider with three tabs, i for each of the primary color channels. Adjust the Levels sliders until the background of the image is plain white. For some images, this may mean pulling all of the Levels sliders to 0.
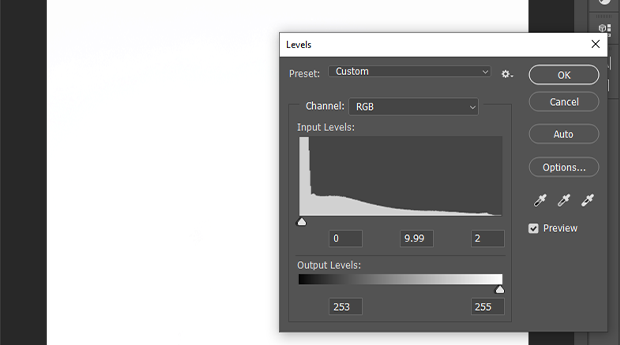
Annotation that adjusting these Levels sliders desaturates the entire paradigm, non but the background We'll remedy that problem in these next steps!
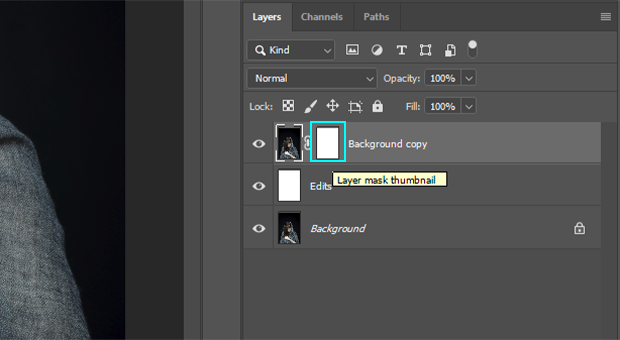
ii. Add a Layer Mask
Now that nosotros take an epitome with a white background, we can create a Layer Mask to add the subject field back into the photo.
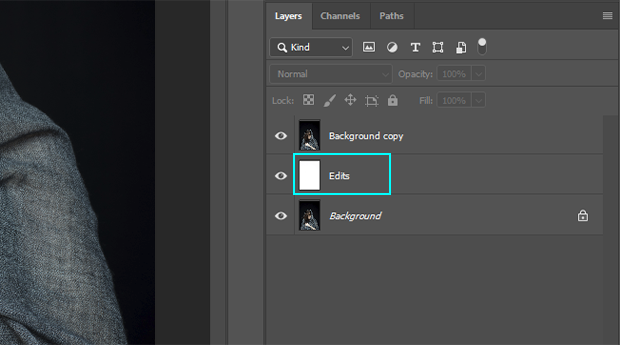
We'll duplicate our original prototype layer every bit we did at the first of the tutorial. At present, we need to reorder the layers in our Layers Console so that the mask reveals our duplicate image layer.
We desire the layer containing the edited white background, which nosotros labeled "Edits," to sit betwixt our original image layer and our duplicate image layer in the Layers panel. Your Layers Console should look something similar this:
Now, let'south add a Layer Mask to our topmost layer, the indistinguishable prototype layer. To add together a layer mask, select the gray square icon with a circumvolve in the middle, located at the bottom of the Layers Panel. Make certain to select the topmost layer before you add together your Layer Mask.
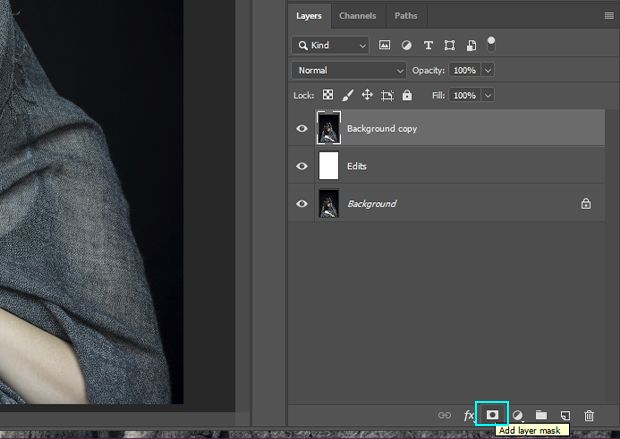
You'll know you've added a Layer Mask correctly when you come across a white layer attached to the duplicate image layer in the Layers Panel.
This mask volition allow us to paint out a portion of the duplicate epitome layer in social club to reveal the layer below information technology. In this case, the layer below is our desaturated image layer.
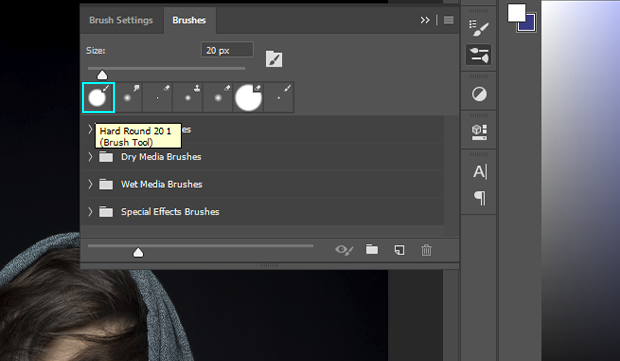
Select the Hard Round brush on the Photoshop Brush Tools Console, or select B on your keyboard. Gear up the opacity of your brush to 100%, using the opacity slider near the top of the Photoshop screen.
3. Paint Out the Groundwork
With your hard-round castor selected, change the color to blackness by clicking on the topmost square at the bottom left of the Tools Panel. Select the Layer Mask, then start painting black onto the mask to reveal the white background.
Pigment out the background around your clients or subjects. Precision is important hither, then don't exist afraid to reduce the size of your castor and zoom in closely. As well, know that you can build up the blackness on the layer mask past releasing and clicking again. This volition permit you to add brightness and darkness as necessary to the groundwork.
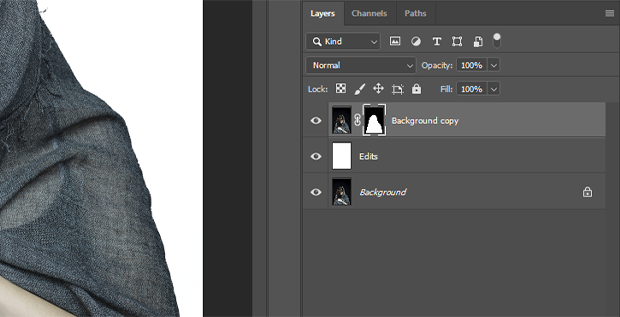
The great affair nigh Layer Masks is that, if you make a mistake, you tin can repaint the portion of the prototype you erased by switching to white pigment. Photoshop makes information technology easy to toggle dorsum and forth between white and black past pressing the 10 central on your keyboard.
A annotation: If you don't want to deal with Adjustments and Levels sliders, you can achieve the same effect by creating a new layer and filling it with white paint. This approach saves a few steps without sacrificing the quality of your edit.
One time you're finished painting in your white background, press Cmd/Ctrl + Due south to relieve your progress.
Use Selection Tools to Make a Background White in Photoshop
The above arroyo is unproblematic enough, but sometimes you need a more than precise edit to make your white groundwork look believable. There'due south a ton of room for error when working with Layer Masks and mitt-painting out your image'south background. Instead, permit'south look at another approach using Photoshop's congenital-in selection tools.
1. Mask the Background
In one case you've imported your paradigm to Photoshop, choose Select from the upper menu, then pick the Select and Mask selection.
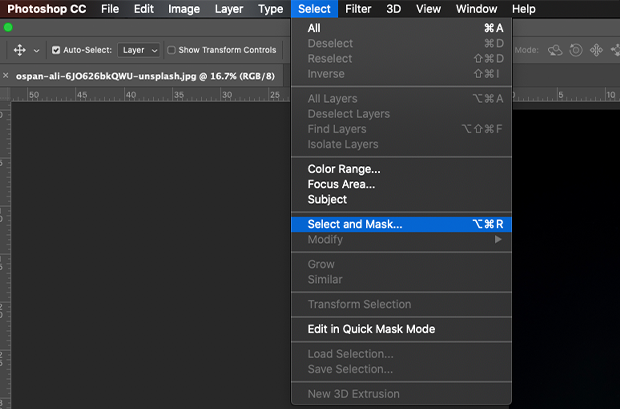
Next, in the upper correct-hand corner of the sidebar menu that opens, cull the drib-down to select a Viewing Style.
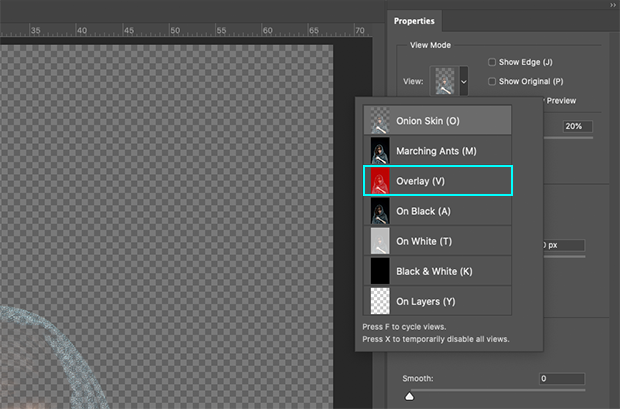
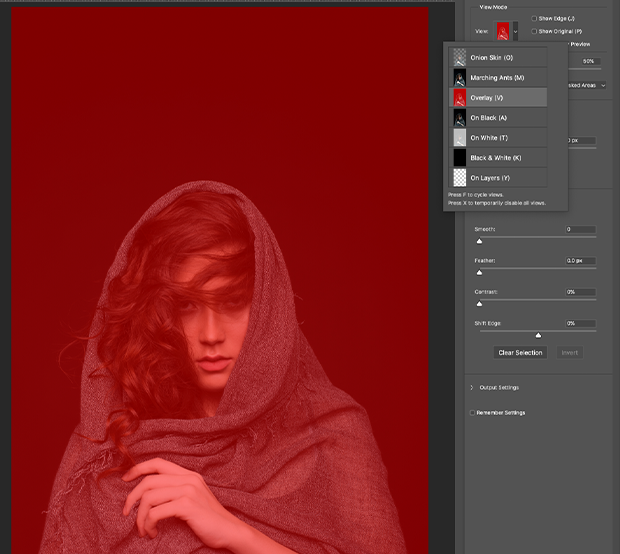
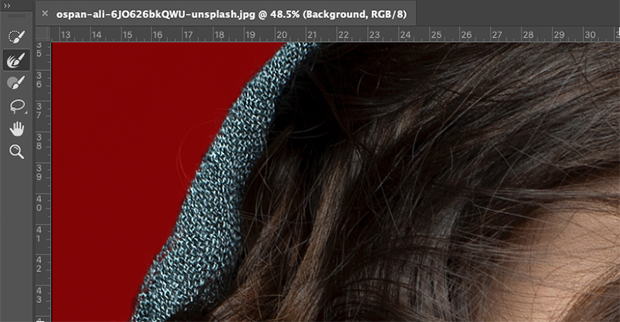
Photoshop's Viewing Modes will help united states to see our edits against our original image equally we make them. For this tutorial, I've called to use the Overlay Viewing Mode. You'll observe that the Overlay mode creates a reddish colour cast over the entire prototype.
2. Select the Image Subject area
Next, we need to tell Photoshop who or what our epitome bailiwick is. To practice that, we'll use the Quick Pick Tool to pigment our field of study in the photo. Simply click on the Quick Selection Tool icon in the upper left of the Viewing Modes screen, so click and drag your cursor to select your subject.
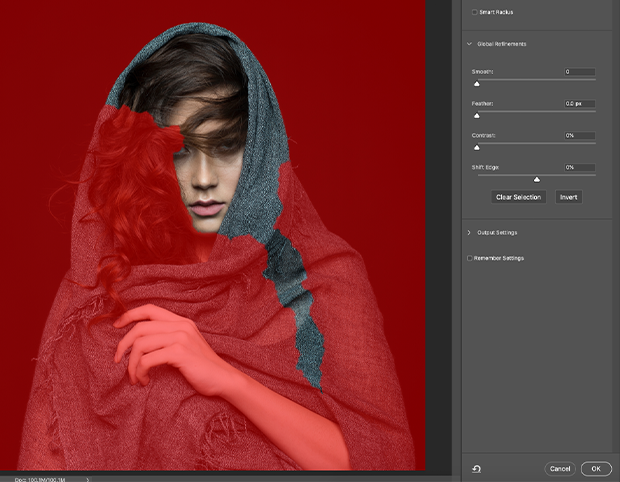
The Quick Selection Tool helps in this process by automatically selecting like pixels across an area. Considering this tool uses AI to detect like pixels, yous'll want to use this approach on images where the subject area stands out from the background, rather than ones where the subject blends in.
Subsequently y'all've painted the bulk of your subject field with the Quick Option Tool, use the Refine Edge Tool from the same left-hand sidebar to create sharper edges effectually your focal bespeak. Recollect, you can zoom into our image to make a closer pick, and you tin adjust your brush tools within the Viewing Modes panel.
When you've painted your subject selection and you're happy with the results, yous're fix to output your selection to the main Photoshop window. To practise this, select Output To >> New Layer with Layer Mask from the lesser right of the screen.
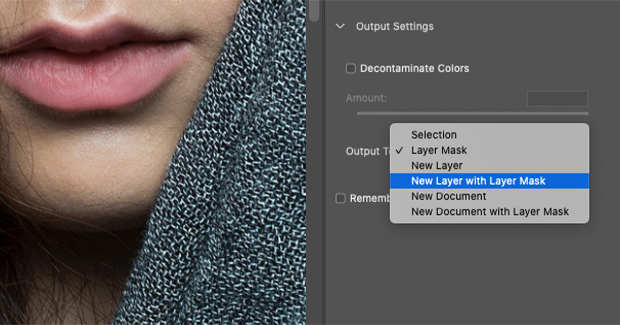
This operation moves your prototype back to the Photoshop home screen in a new layer. This new layer has the groundwork of the photo masked out, which just leaves your bailiwick remaining.

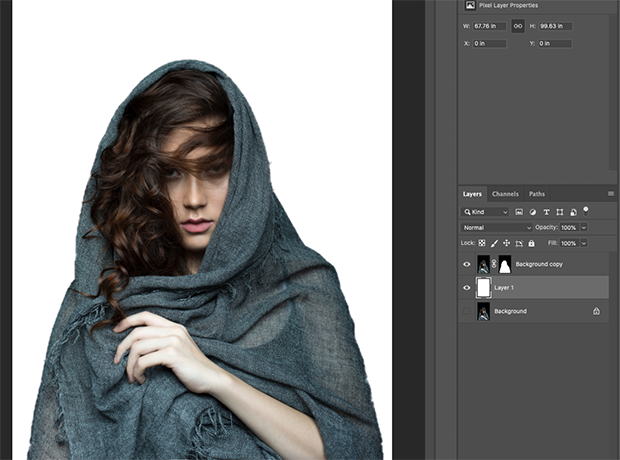
3. Add a White Background
Now that you lot've elminated the background, yous tin can add in a white background behind your subject. Just create a new layer past selecting Layer >> New >> Layer. Choose a manifestly white, and apply the Fill Tool to paint the layer white.
Motion this white layer underneath your masked image layer in the panel to put your bailiwick on a white background.
4. Impact Up Your Work
At this footstep, you may discover that non all of your edges are crisp. That'southward okay! Although it uses AI, the Quick Selection Tool isn't fool-proof. We tin set these edges pretty easily at this point in our editing process.
To further refine your edges, you lot can merely zoom into the photo and pigment with a blackness brush onto the mask. That will erase the fringed edges of your photograph.
If that sounds too tedious, you can choose to employ the Defringe Tool instead. Navigate to the top menu, and then select Layer >> Matting >> Defringe.
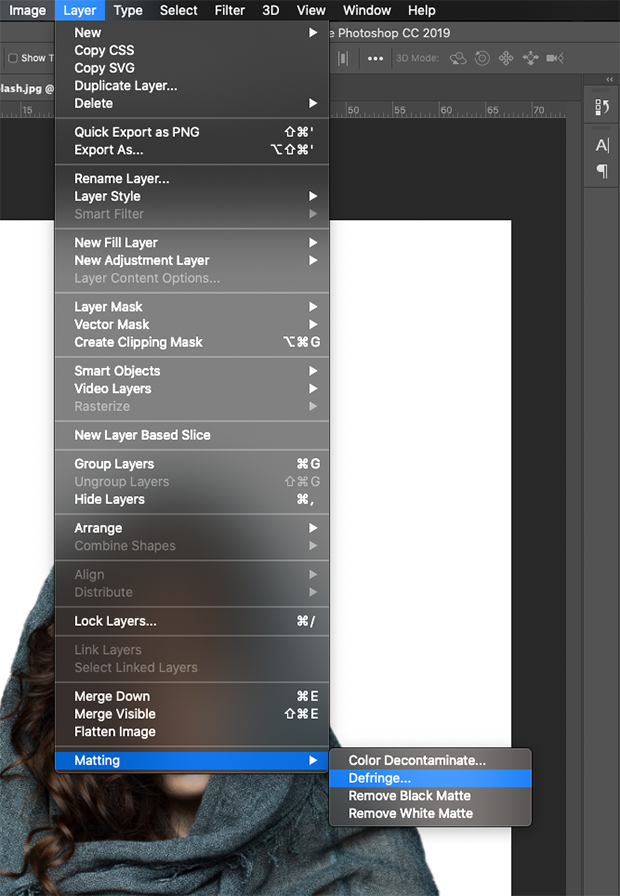
A dialog box will announced and ask you to input a pixel value. This pixel value determines how many pixels Photoshop will remove from the edges of your subject. I used a x pixel value for my prototype, just each photo will exist unlike. Play effectually with the pixel value until yous find one that suits your edit.
At present, make sure to save your progress!
4. Bank check Your Work
Regardless of the editing approach you chose, you'll need to make sure that you've accomplished the upshot y'all wanted. While your background may look white, it may non be completely white.
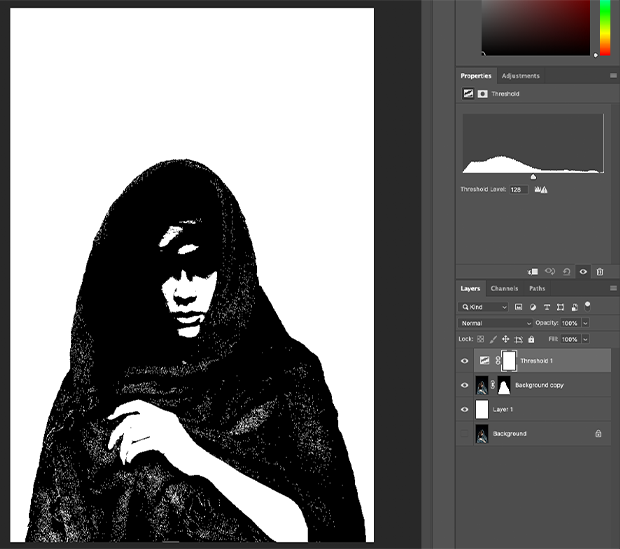
The easiest style to decide if your paradigm background is plain white is to create a new Threshold Aligning Layer by choosing Layer >> New Adjustment Layer >> Threshold from the upper carte du jour.
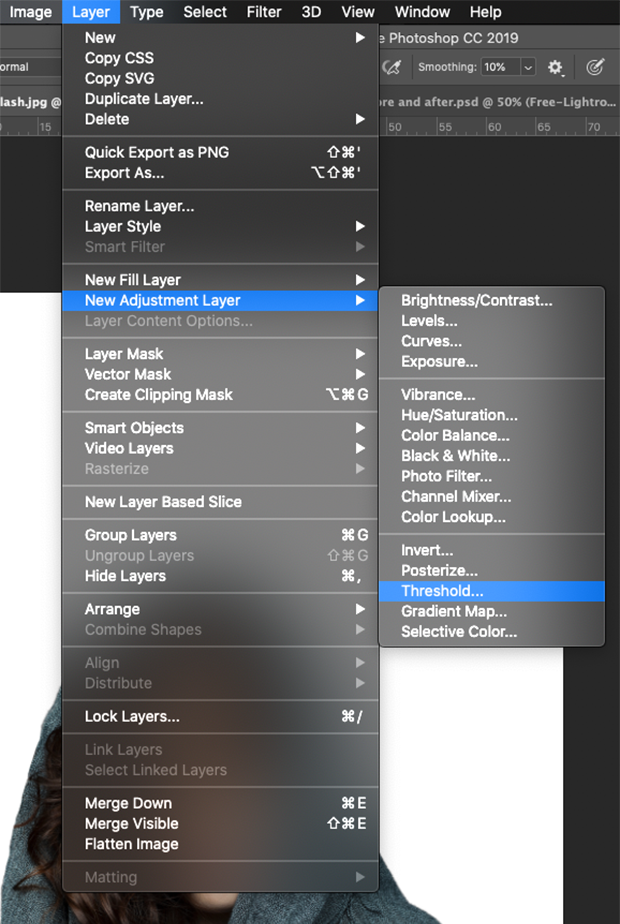
Click OK in the dialog box that appears. So, move the Threshold slider all the way to the left. If y'all see any blackness remaining in the background of your image, and then your background isn't plain white!
If yous notice a border betwixt your epitome and the groundwork in Photoshop, become into your menu and select Photoshop > Preferences > Interface. Click "None" for your border options on all of your layers to resolve the problem.
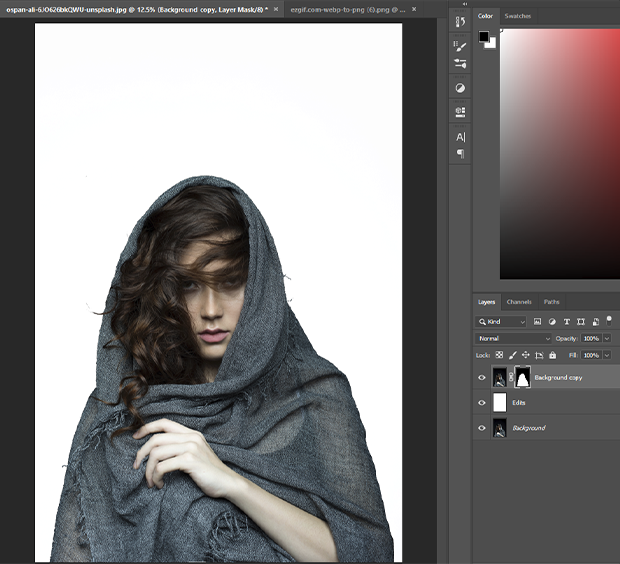
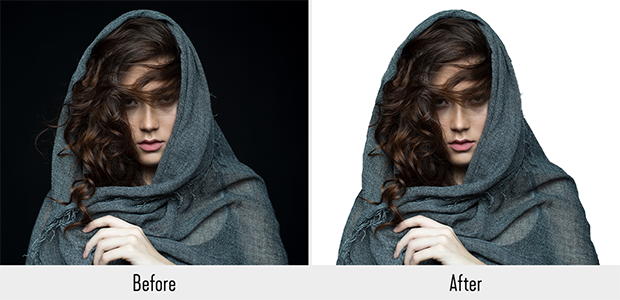
Here's our concluding result:
Making a Background White in Photoshop Has Never Been Easier
There you lot take it! Everything you lot need to know about how to make a groundwork white on Photoshop. With these skills, y'all'll be able to edit and adjust your images to perfection in no time!
For more photography tips, editing tutorials and WordPress guides, follow usa on Facebook and Twitter. Make sure to sign up for our e-mail list, likewise, then y'all don't miss a single post!
Using WordPress and want to get Envira Gallery free?
Envira Gallery helps photographers create beautiful photo and video galleries in merely a few clicks then that they can showcase and sell their piece of work.
Related Posts


How To Place Product In Image On White Background,
Source: https://enviragallery.com/background-white-in-photoshop/
Posted by: ortizfamannot.blogspot.com
0 Response to "How To Place Product In Image On White Background"
Post a Comment